Importing data via the "Import" menu tab
The Import tab provides numerous functions for importing different data types. When you create a new project, the tab is automatically opened so that you can start importing data directly:

How to import standard data such as texts, PDF documents, tables, images, or audio / video files:
- Go to the Import tab and click on the appropriate icon for your data type, such as ranscripts to import interview transcripts, and Texts, PDFs, Tables to import Word files, PDF documents, or Excel files.
- A dialog window will appear, in which you can select the files to be imported. Press Ctrl (Windows) or ⌘ key (macOS) to select multiple files at once.
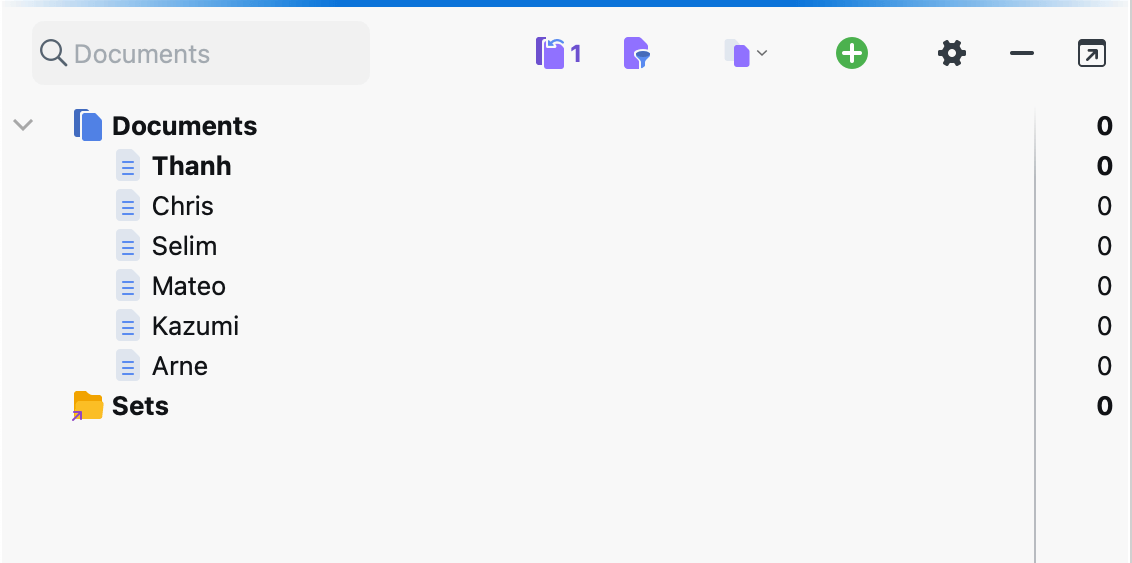
The files will be inserted into the open MAXQDA project and displayed in the "Document System" window. The following figure shows that several text documents have been added.

By default, all inserted texts, PDF documents, tables, and images are saved in the project file. This means that you can modify or delete the source file without effecting the file in the project. Conversely, you can make changes to a file in MAXQDA, for example correct typing errors, without changing the source file. Exceptions are audio and video files, which are not stored in the project due to their size, but in a special folder for external files. The same is true for PDF documents and images that exceed a configurable file size. For more information, see External Files.
When inserting a file, MAXQDA takes the file name as the document name, which can be modified later. Depending on the type of document, different icons are displayed.
Ordering the documents in document groups
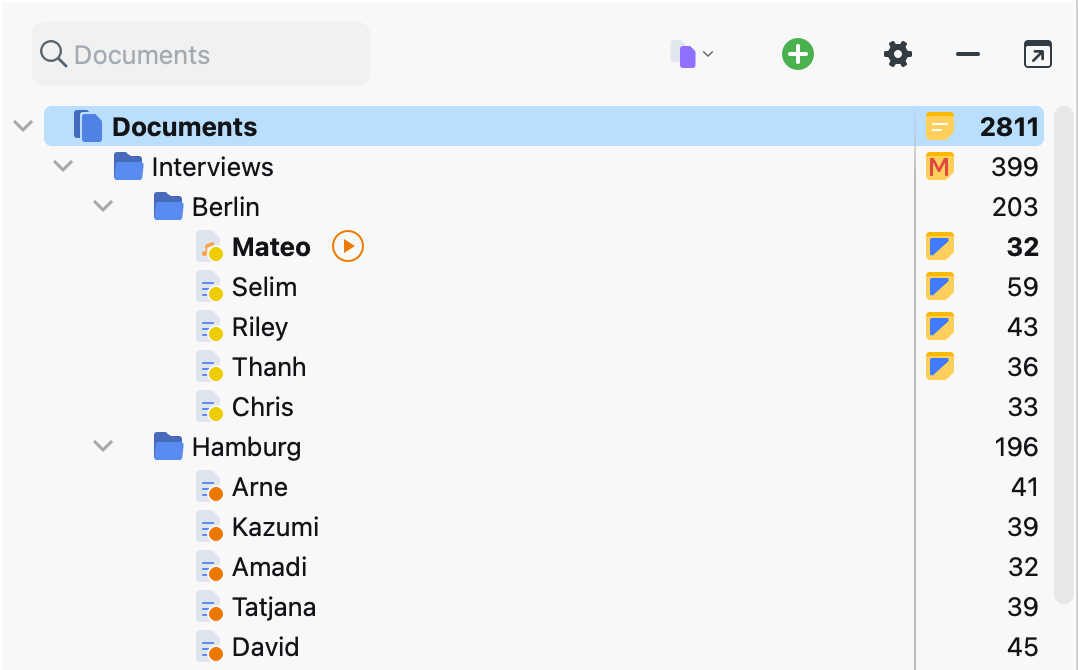
Once you’ve imported your documents, you’re ready to begin your analysis. However, most people don’t start analyzing right away, but prefer to organize the documents in folders. In MAXQDA, these folders are called "document groups". They work just like folders on your computer – you can name them and drag documents into them.

There are several ways to create a new document group:
- Click the green plus icon in the "Document System" toolbar or in the first row and select New Document Group from the menu.
- Right-click on the root folder in the "Document System" and select New Document Group from the context menu.
MAXQDA then creates a new document group at the current position and automatically assigns a name and number to it. To give the document group a meaningful name, right-click on it and select Rename. Alternatively, click the name once to select the line and then click the name again.
Suitable names for document groups are, for example, the types of data (individual interviews, group discussions, document analyses, etc.) or the differentiation criteria resulting from the sampling (first survey wave, second survey wave, church organizations, public organizations, etc.).
You can change the order of the document groups at any time using drag-and-drop.
More import options
You can import documents not only from Import tab but also using several other ways:
- Click the green plus icon on the toolbar of the "Document System" and select Import Documents.
- Or use the keyboard shortcut Ctrl+D (Windows) or ⌘+D (macOS).
- Or right-click on the root folder in the "Document System" or a document group and select Import Documents from the context menu.
As described above, a dialog window opens, allowing you to select files for import.
Importing documents via drag and drop
Files can be imported using drag and drop: select one more documents in the Windows Explorer or Mac Finder and simply drag and drop them into the "Document System" at the desired position.
Tip:
- To import the documents of a whole folder into MAXQDA, drag the folder from the Windows Explorer or Mac Finder into the "Document System". MAXQDA then creates a new document group with the same name of the file folder at the top of the document "tree" and imports all documents that MAXQDA can import. If the folder contains subfolders, these are also created as separate document groups.
- You can use the keyboard shortcuts Ctrl+C + Ctrl+V (Windows) or ⌘+C + ⌘+C (macOS) to copy and paste documents and document folders into the "Document System".
Moving and sorting documents
Moving individual documents
You can change the order of a document in the "Document System" by clicking and dragging it to the desired position.
Moving multiple documents
You can select multiple documents by holding down the Alt key (Windows) or ⌥ key (macOS) and then dragging the selection. To select a range of documents, first click a document and then click a second document while holding down the Shift key ⇧. This will select all documents between the two clicked documents.
Moving multiple documents by activating them
To move multiple documents at once, first activate them by, for example, clicking on the circle symbol in front of their document symbol (the documents will then be highlighted). Now right-click on a document group and select Move Activated Documents Here.
Sorting documents
To sort the documents in a document group, select Sort Documents from the context menu of the document group and then the desired sort order from the drop-down menu. Sort criteria include Document Name, Last Action, and Text Length (only text, table, and PDF documents are considered).
To sort document groups by names, right-click the root folder of the "Document System" window, and select Sort in Ascending Order to sort them from A-Z or Sort in Descending Order for reverse order.
Document sets
MAXQDA allows you to create and save temporary sets of documents. While each document can only be in one document group, it can be in as many document sets as you like, because document sets consist only of links to the documents. In other words, a document from a document set can be deleted without affecting the document itself. However, if the same document were deleted from a document group, it would be deleted from the project along with all of its memos, coded segments, links, etc.
Document sets are very usefule when you want to analyze a particular selection of documents. Creating a document set is also an easy way to store the result of a complex activation by variable process.
How to create a document set
- Activate all documents to be included in the set, for example, by clicking on the circle in front of the document symbol.
- Right-click on the word Sets at the bottom of the “Document System” window.
- Select New Set From Activated Documents.
MAXQDA will create a new set with the name “Set 1” and adds all activated documents to this set. You can right-click the name and select Rename to give the set a more appropriate name. Document sets may be used like document groups, for example, you can activate all the documents in a set by activating the set.
Modifying document sets at a later stage
- Drag and drop additionaly documents or multi-selected documents into the desired set and MAXQDA will insert them at the top of the set.
- Right-click on a document in a set and select Remove Document from Set to delete it from the set.
- Drag and drop documents to move them from one set to another.
